August 26, 2021
By Chris and Nicolette Foss
As with anything you love, your hammered dulcimer will stand the test of time when it is well-maintained and handled with care. Knowing how to properly tune, adjust, clean, and maintain your instrument is essential to keep it sweet-sounding and by your side for years to come.
In this article, we will give you some of our tried and true tips for troubleshooting issues you may have with tuning. For instance, did you know a misplacement of the treble bridge can be one of the main reasons you can’t get your dulcimer to tune up? But not to worry, we will walk you step-by-step on how to set the bridges. We will also explain how to change the strings to keep your hammered dulcimer sounding as good as when you first bought it!
Tuning Tips
Even if you followed all the steps in our How to Tune blog post or have followed our helpful tuning videos, you may still find that your dulcimer is difficult to tune. If this is the case, you may need to check the way the treble bridge is set.
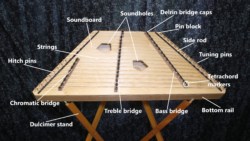
Here is a diagram of the hammered dulcimer to help familiarize you with some of the terminology in this post:
Setting hammered dulcimer bridges
For hammered dulcimers to tune up easily, the treble bridge needs to be set in precisely the right place. Even having the treble bridge 1/64″ off can make the instrument hard to tune and unpleasant to play. Or it may even be playable, but not sound as sweet as it should.
Possible causes for misplacement of the treble bridge include things like:
- Movement: Bumping the dulcimer can cause the treble bridge to shift its position.
- Time: Dulcimers always change shape slightly over time due to the tremendous tension of the strings, and this can throw the tuning off.
But not to worry, this is the most easily corrected problem if you know what to do! The following information holds true for all hammered dulcimers no matter who made them.
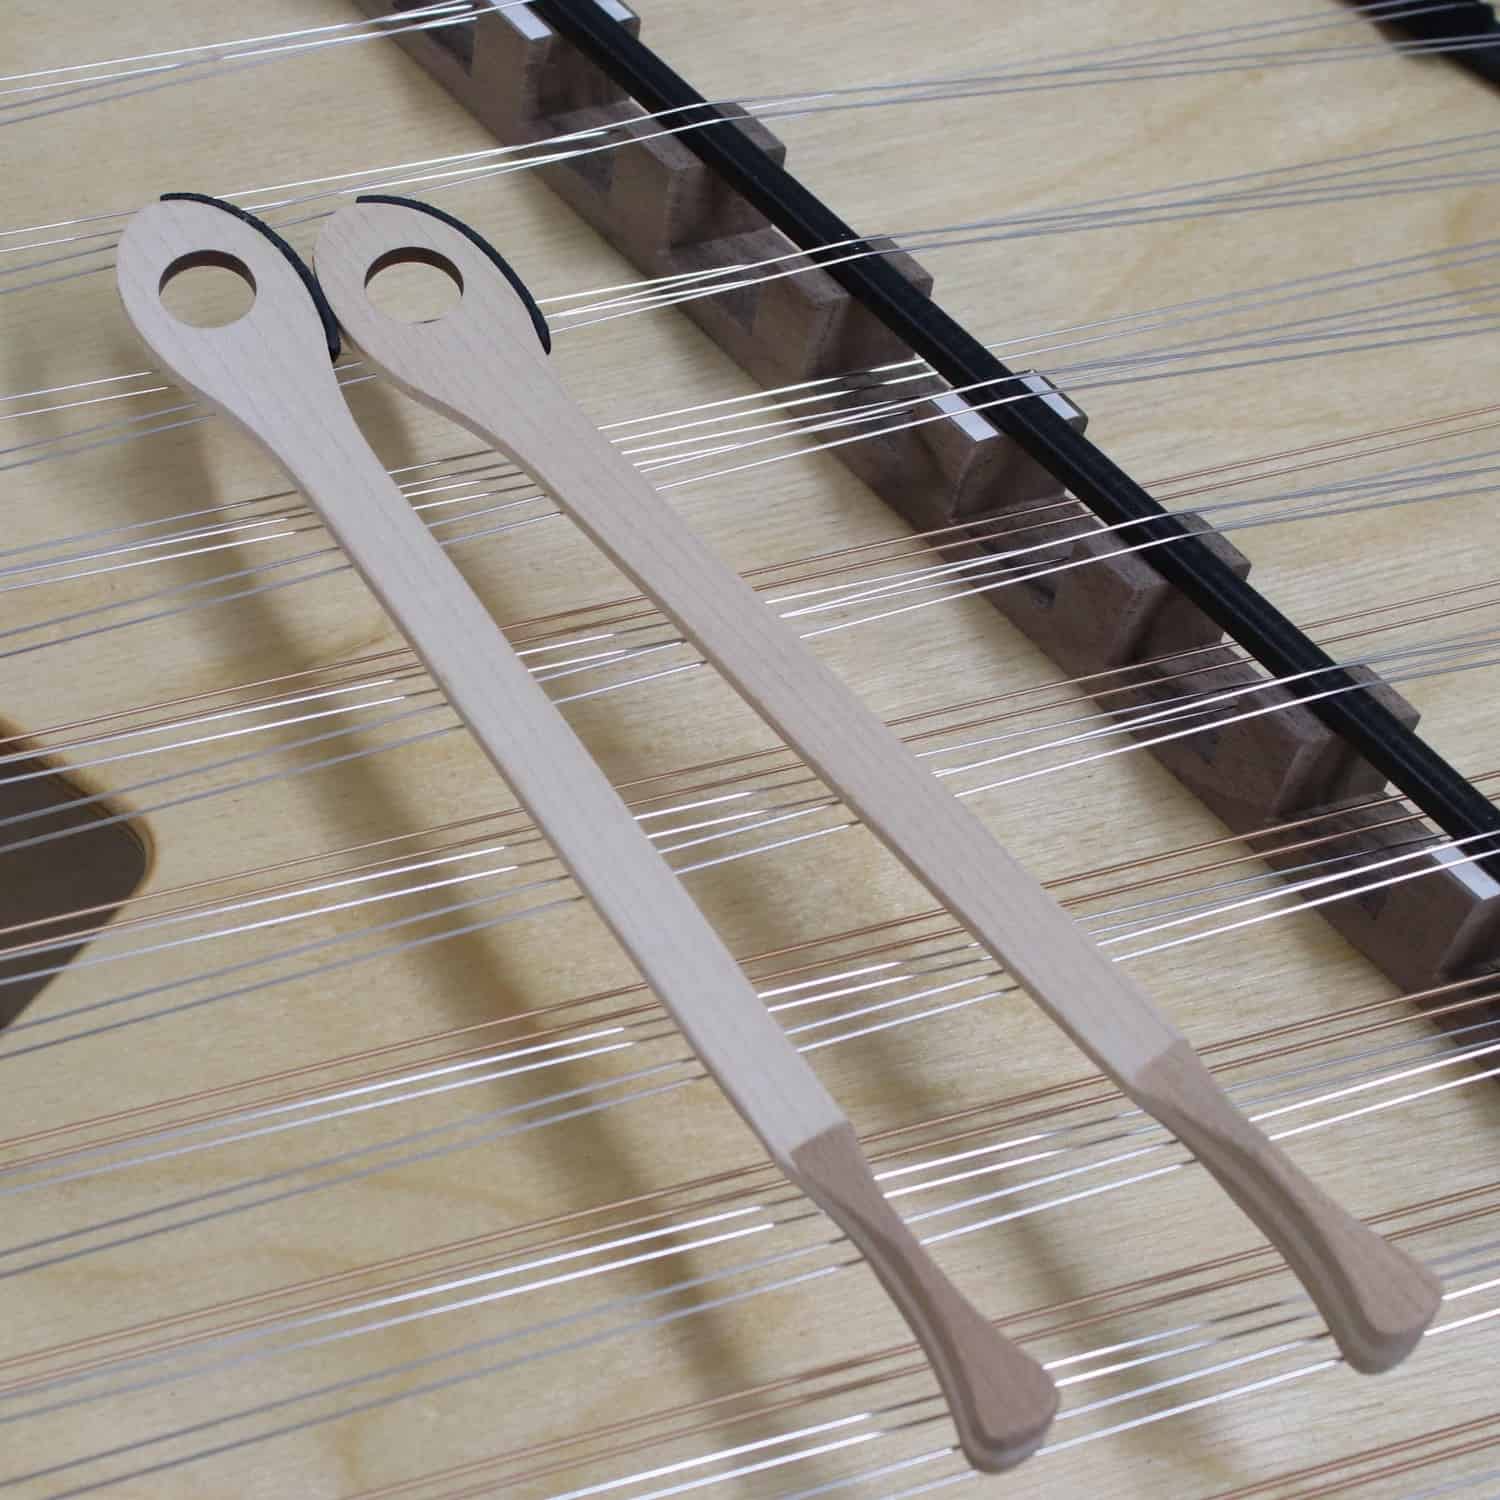
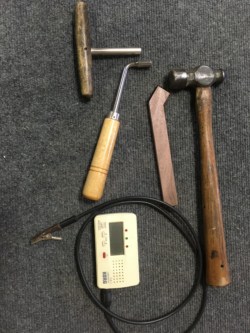
Featured in the picture below are all the tools you may need to set your bridge: Either a T-handle or gooseneck tuning wrench, a hammer, and a tuner. You’ll need either a good chromatic electronic tuner (we like the Snark SN1X) or a cell phone app with some version of VU meter. If you don’t already have one, you need one just to keep your instrument in tune. They have become indispensable, and are fairly cheap. There are some good apps out there that are free which you can easily download (check out our top picks of dulcimer tuner apps). The mysterious wooden instrument in the picture is a bridge banger, which reaches down through the strings and is tapped with the hammer to gently move the treble bridge. You can pick one up here from Masterworks.
Process for setting the treble bridge on your hammered dulcimer:
- Have your dulcimer approximately in tune, so the whole thing is at about the right tension.
- Tune the bottom marked course (the two strings running together) on the treble bridge so the note on the right side is exactly what it is supposed to be. This will be the note A if your instrument is a 16/15 (or 15/14) or D if your instrument is a 13/12 (or 12/11). Pluck one of the two strings making up that course on the right side of the bridge with your fingernail while damping the other string and both of the strings on the other side of the bridge. This will give you a good accurate reading of what note that string is making with no interference from other strings. Wait for the needle on the tuner to settle so that you know that the string is exactly in tune. Now pluck the same string on the left side of the bridge while damping the three other components of that course. Look at the meter, is that note exactly in tune? If it is, that’s great. But check the rest of the bridge.
- If it is sharp (the pitch is too high), then this indicates that the string length on the left side of the bridge is too short. This means the bridge will have to be moved to the right slightly. If the note on the left side of the bridge is flat (the pitch is too low), then the string length there is too long and the bridge will have to be moved to the left slightly. Before you move it, tune the note down one step, and then back up to the right note, and check your readings on both sides of the bridge just to make sure. If the bridge needs to be moved, carefully put your fingers down through the strings in the area of the notes you tested and move the bridge just slightly, a hair’s breadth or more will probably do it. If you prefer it, use the bridge banger and hammer to move the bridge.
- Now tune your test note down a step and back up to the note it is supposed to be. This equalizes the tension on both sides of the bridge. Never check a note without first doing this.
- Now check your notes on both sides of the bridge remembering to damp the strings you don’t want to hear. Is the note on the left side of the bridge closer to in tune now? Keep moving the bridge and rechecking the notes of your test string on both sides until the notes on both sides are in perfect tune. If you have trouble moving the bridge accurately with just your fingers, you can use something to tap the bridge along its bottom at that point. We put the head of a gooseneck wrench down through the strings and use it for light taps to the base of the bridge, but you can use anything that will work.
- Move to the top marked course on the bridge and repeat the procedure. This will be F on the right side of the bridge, and C on the left. The only differences will be that smaller moves of the bridge will make larger changes in the relative notes, and it will be harder to move the bridge due to the greater down pressure of the strings.
- Once you have the bottom marked course and top marked course adjusted exactly, the rest of the bridge must be in a STRAIGHT line between these points. To check this, you can hold a straight edge ruler alongside the bridge. If the bridge between the two points you have set is not straight, move it until it is, being careful not to move the two points.
- Now you should also use your test procedure to check points all along the bridge. Bridges are flexible. If the top and bottom points are adjusted properly, the middle can still be off. Just check and adjust until you get the whole bridge in tune on both sides.
- If you pluck a string on both sides of the bridge at the same time you should hear a sweet ring which you probably didn’t hear before. It is the harmonics of the string on both sides working in unison, and it’s what makes the hammered dulcimer sound so wonderful.
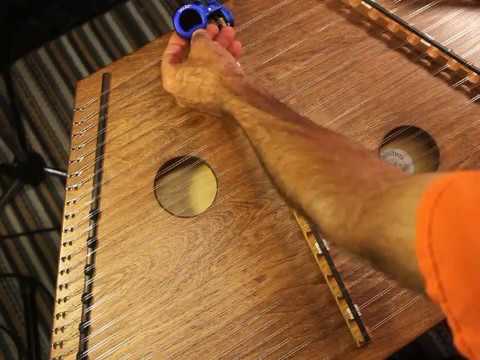
If you are having trouble with these steps, follow along with Chris in this video on how to adjust dulcimer treble bridges:
Troubleshooting Your Tuning Problems
So now that you have the bridge in the proper position, check to see if your instrument is now in tune. If it seems to be all in order, then you are ready to jam out! However, if you are still having issues, try the following suggestions to troubleshoot the exact problem.
Delrin bridge caps/strings discrepancy
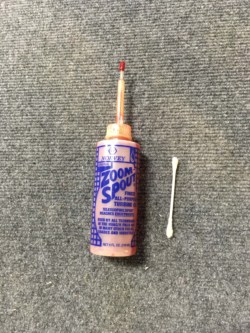
This is a used bottle that I filled with automatic transmission oil which we use to lubricate the bridge caps as well as many other things
If some of the strings are still not tuning up correctly on both sides, the strings are probably hanging up in the Delrin bridge caps. This is caused by:
- Older strings: Older strings can have corrosion that isn’t visible, which can prevent them from sliding across the Delrin bridge caps freely enough for the tension to equalize on both sides.
- Smaller bridge caps: If your dulcimer has the smaller ⅛” bridge caps, the strings probably have dug themselves a groove to hang up in.
Solution: Luckily there is an easy fix for this! Get some light, non-drying oil like 3 in 1, or sewing machine oil, or automatic transmission fluid but NOT WD40. Put a couple of drops of the oil on the end of a Q-tip and then touch that end to the strings where they cross the bridge caps. The oil will transfer and creep down around the strings and lubricate that point. If you got too much on, just wipe up any excess. Don’t worry, the oil won’t hurt a thing. Now the strings will slide freely over the bridge caps and the tension will equalize as it should.
Another pro tip for this issue is to tune the part of the string away from the tuning pin, then adjust the side toward the tuning pin just slightly until both sides are in tune.
Shortening or lengthening strings on side rods
If your bridge is properly set, and you’ve used the oil trick and there are still a couple of strings giving you problems, you can shorten or lengthen them where they cross the side rod. If you move the string on the side rod up, that is away from you, toward the top rail of the dulcimer, you shorten it just a little.
Solution: So, you can move the offending string one direction on one side rod, and the other on the opposite side rod and affect a large change in how close they are both to in tune. This is especially important on instruments like Masterworks that have a steeply angled pin block.
Procedure for adjusting an older instrument
Let’s say you have bought a used dulcimer of undetermined age and you want to get it into tune and play it. Since you are not familiar with the particular instrument or its past maintenance history, we recommend adjusting it in the following order:
- First, start with the oil trick outlined above to make sure the strings slide freely over the bridge caps. Then tune up completely as close as possible.
- Next, check the bridge set as outlined above and adjust if necessary.
- If there are still a couple of offending strings that still aren’t tuning up correctly, move them on the side rods.
- Now it is time to play and love your new (used) hammered dulcimer!
Care and Maintenance Tips For Your Hammered Dulcimer
The best thing to keep your hammered dulcimer in good shape is to keep it in tune. If you get a lot of use out of your dulcimer, keep it on its stand. This will encourage you to play it more if you have easy access to it. However, make sure it is not in a heavily trafficked area where it can get easily bumped.
To ensure a longer life for your dulcimer, keep it tucked away neatly in a hammered dulcimer case.
Changing hammered dulcimer strings
Replacing the strings after you’ve gotten a lot of use out of your hammered dulcimer will ensure beautiful sounding music!
Strings last an indefinite amount of time. How long they last all depends on the environment and how much playing they get. For instruments that don’t get played a lot and are stored in dry conditions, we estimate the strings are good for at least 20 years. Chris plays a lot and has never worn out a set of strings, but there are people who have.
Here are some signs you may need to change your hammered dulcimer strings:
- If the strings are seriously corroded
- The strings just won’t tune the way they used to
- The dulcimer just doesn’t sound as good as it used to, even when it is tuned properly
If your instrument shows one or more of these signs, it is probably time for a new set. You can order your strings here. Your dulcimer will thank you for these new strings with sparkling new sound!
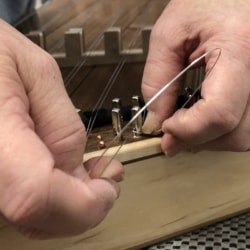
Process for changing your strings:
You will need a good pair of 5-inch diagonal cutters, your tuning wrench, and the string set appropriate for your dulcimer. Choosing the right string set is important since dulcimers by different builders do not necessarily use the same gauge strings. If you do not have the set made for your instrument, nor a string chart showing the gauges of the strings, you can measure the ones that are currently on your dulcimer with a set of dial or digital calipers.
- Take off your strings. First, loosen the strings on 3 or 4 courses with a ½ turn or so of the tuning pin. Then cut them with the diagonal cutters. Remove the ends however you need to. Sometimes it is difficult but you must get them completely off. We recommend only taking off 3 or 4 courses of strings on one bridge at a time and replacing them before moving on to more strings. If you have to take everything off at the same time, be sure to keep careful track of what part goes where on your dulcimer so you get the bridges back on in the same orientation they were originally. On the plus side, if you do take everything off at once, it gives you a good opportunity to clean your instrument thoroughly!
- Next, turn the tuning pins so that the holes are facing across the dulcimer.
- If both bridges are still on, thread the first string through the bridge you are not working on exactly how the original was.
- Then hook the loop end of the string on the hitch pin and pull tight, keeping tension on the string so it doesn’t come off the hitch pin. For tuning pins on the right, wrap the string twice around the pin.
- Push the wraps down below the hole and thread the end of the string through the hole from the outside toward the center of the dulcimer. Get a hold of the string with the diagonal cutters just enough to get traction but not to cut through.
- Then use the top of the tuning pin as a fulcrum to lever the string tight with the diagonal cutters. Once the slack is taken up around the tuning pin the string will kink where it goes into the hole, and this is what makes it hold when under tension.
- Then you can cut the end off flush with the diagonal cutters. Now if you’ve got the string on tight enough, a ¼ to ½ turn should bring it up to tension. Did that seem difficult? Don’t worry, you’ll get better at it with time. Was it a piece of cake? Hey, call Chris, we’ve got a job for you!
- Continue on replacing several strings at a time until the whole job is done. Now you are a pro! Tune up, check the treble bridge set, it will probably have changed just a little. If your dulcimer has the smaller ⅛” Delrin bridge caps and they are individual pieces, a good thing to do as you are changing the strings is to rotate them so you have a fresh bearing surface for the strings.
Most of us struggle when changing our strings for the first time. If this is you, you are not alone! If you are still having trouble getting a handle on how to change your strings, follow along with Chris in this video:

Cleaning your hammered dulcimer
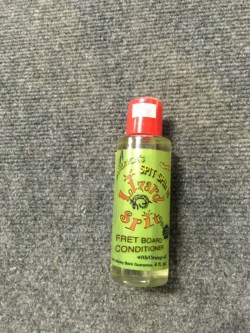
We like to use drying orange oil Lizard Spit to clean our dulcimers.
Regardless of how you store your instrument, it is sure to collect a lot of dust, which will call for a thorough cleaning. Here are some common methods to clean up your beloved hammered dulcimer:
- Some people will use a clarinet swab or feather duster to reach the dust underneath the strings.
- You could also get a strip of sticky back felt or even a piece of cloth and attach it to a ruler.
- You can spray a little Endust or something similar on your ruler or swab, and it will really suck up the dust.
- To get down between pins and into places the swab won’t reach, use a soft bristle paintbrush to loosen the dust, then just blow it away either with your breath or some canned air for cleaning your keyboard.
If you don’t have any cleaning tools at home, consider purchasing our hammered dulcimer cleaning kit, which comes with a felt-covered stick, lemon oil, a cloth, and a brush.
Other than dusting, nothing needs to be done. We recommend not using any oils except ones that dry. If some crud gets stuck on the finish, we typically clean either with some mild soap and water or with lemon or orange oil, both of which will dry. We use Lizard Spit, which you can buy from Sweetwater here. You can use furniture polish if you like, but only on the back and sides, not on the top as it will creep down around the tuning pins and can impair their function.
How temperature and humidity affect your hammered dulcimer
We recommend that you monitor the temperature and humidity your hammered dulcimer is kept at. When it comes to temperature, if it is a comfortable temperature for you, it is also comfy for your dulcimer. When kept in extreme temperatures, this can cause a change or warp your instrument. For instance, heat can soften the glue inside your dulcimer, which can cause problems with string tension. Cold will not usually affect your dulcimer, but extreme cold may cause shrinkage of the wood. For these reasons we recommend keeping your instrument away from the following:
- Direct sunlight
- Cold storage facility
- A car in the heat of summer
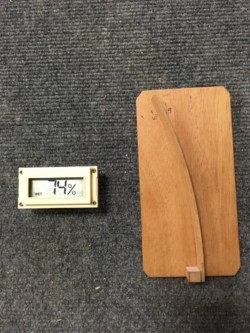
Two kinds of hygrometers to help measure humidity
How about humidity? Wood shrinks or swells quite a lot due to changes in the humidity of its environment. In the summer it takes on moisture and swells. It then loses that moisture in the fall when we start heating our homes and the humidity goes down.
Our Songbird Dulcimers don’t need any special care for humidity since they are either built of plywood or have the tongue and groove tops that move freely. However, some dulcimers by others that have wide solid wood tops require special care in the wintertime. It is necessary for these instruments to be kept humidified; typically a room around 40% relative humidity is recommended.
If allowed to dry out too much the dulcimer’s wide top can develop a big crack right across it. So if you have one of these kinds of instruments made by others, hopefully your house is humidified. If not, get a small humidifier and run it in the room where the dulcimer is kept during the wintertime. You can keep track of the humidity of your instrument with a hygrometer.
But not to worry, if you get a crack it isn’t the end for your dulcimer, it is just unsightly. The cracks usually don’t affect the sound or structural stability. And when summer comes, the crack will close up again at which time it can be glued. Or you can just leave it, knowing that it will open again in the winter.
We once measured the difference in width of a 16/15 top in winter, then again in summer. The difference was .144 inch, which is more than ⅛ inch. That is a lot of stress and a pretty big crack! That is why Chris solved that problem with the tongue and groove top design we now use on all of our solid wood topped dulcimers. This method is guaranteed to keep your instrument well-adjusted for humidity.
A Quality Hammered Dulcimer Can Last a Lifetime
Thank you for taking the time to learn how to maintain your instrument. As a result, you will always have a quality hammered dulcimer to play to your heart’s content. Your Songbird dulcimer is sure to enrich your life and the lives of those around you through the joy of music.
What sort of issues do you have when maintaining and caring for your hammered dulcimer? Leave us a comment below so we can solve the problem together. Or do you have more helpful tips to share with the dulcimer community? We’d love to hear them!
Click here for a printable version of this post.
Tags: hammered dulcimer maintenance, hammered dulcimer troubleshooting, hammered dulcimer tuning3 Comments
-
Carol Myers says:
Wonderful tips. Thank you so much for all the hard work you put into it.
-
John C. Dommerman says:
Cleaning the HD: I would recommend a cover quilt or some sort of cover to put over the HD when not playing. No use letting house dust etc. land on the instrument to make it dirty. It is extra cost to have one custom made, but IMO, well worth it, and should last the life of the HD.
-
Songbird Dulcimers says:
Great idea! Thanks John!
-